Developing a kitchen garden
How to grow own food in your kitchen?
Research, concept and design of a hydroponic garden.
| Assignment | Project for the course “Industrial Design” |
| Team | 2 people |
| Time | 6 weeks |
| Tags | Design thinking, industrial design, product design |
The Challenge
The assignment for our course was simple: Use Design Thinking to develop a virtual prototype of kitchen appliances with a common design language inside a team. Though as we were brainstorming for kitchen appliances, we questioned why most devices only prepare food and don’t help it grow. Being able to harvest food in your kitchen would save transport costs, reduce food waste and could simply be more environmentally friendly. So we decided to develop a sprouter (my teammate’s prototype) and a small hydroponic garden (my project) for the kitchen.
Approach
One of the requirements throughout the process was to use Design Thinking, so we chose our methods based on its steps. We ended with 3D visualisations of the products.
Overview
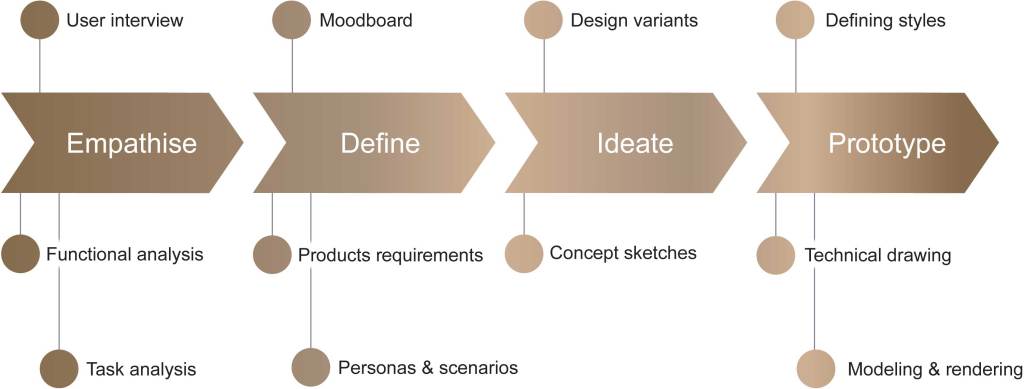
Empathise
First of I researched different systems of plant growth. This is when I found out about hydroponics, where the roots of plants get fed by a water solution. Since it’s easier to access water inside a typical German kitchen than soil, I continued with this system and searched for similar products.
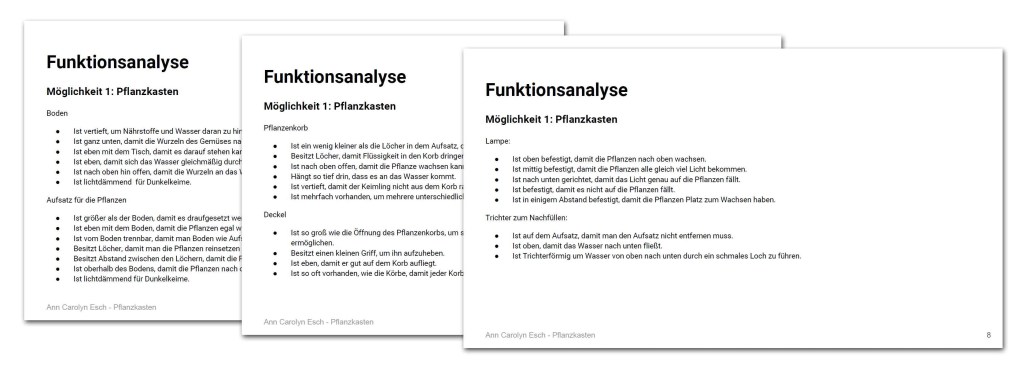
To gain a deeper understanding for what parts of the products are important and why they are formed and placed in a specific way I did a functional analysis – listing every component and its benefit.
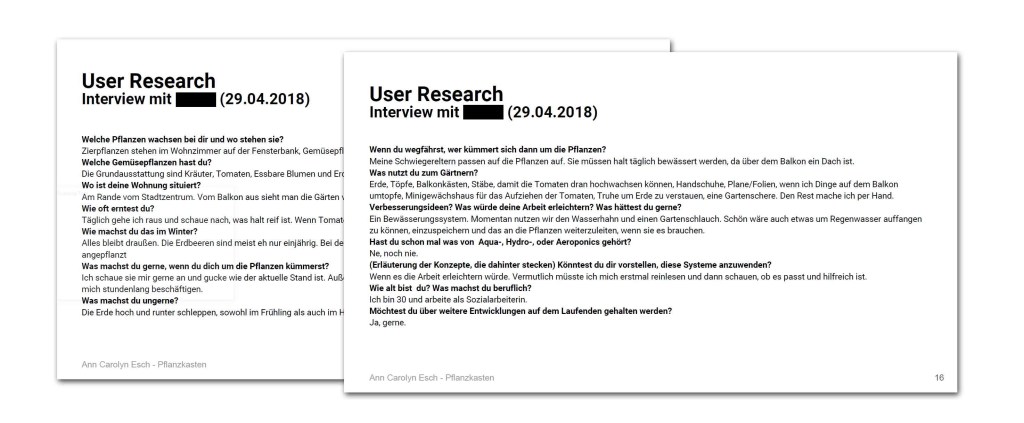
In the next step I would have preferred to do a contextual inquiry to see the interaction between the product and its user, but unfortunately the search for a person who already used a hydroponic system living close by was sadly without success. So I instead interviewed a person who had planted vegetables and some berries on their city balcony for a few years. She told me of some of her pain points like carrying the soil upstairs, regular watering, and the arrangements if she wasn’t home for a few days.
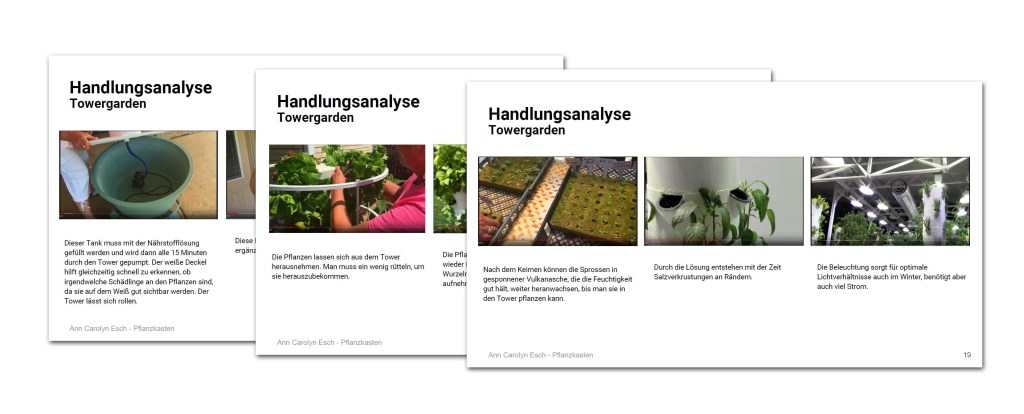
Although I’ve gained important insight from the interview, I still longed to see interactions with a similar product. So I turned to the internet and thankfully found some really helpful videos of people showing off their hydroponic garden. I focused on the product “Towergarden”, analysed the tasks, the positive feedback and the customer complaints. From this I’ve gained valuable information like the volume and frequency of the pumps, the mineral residues after some usage time, the white colour of the tower that helped to see pests early, and so on.
Define
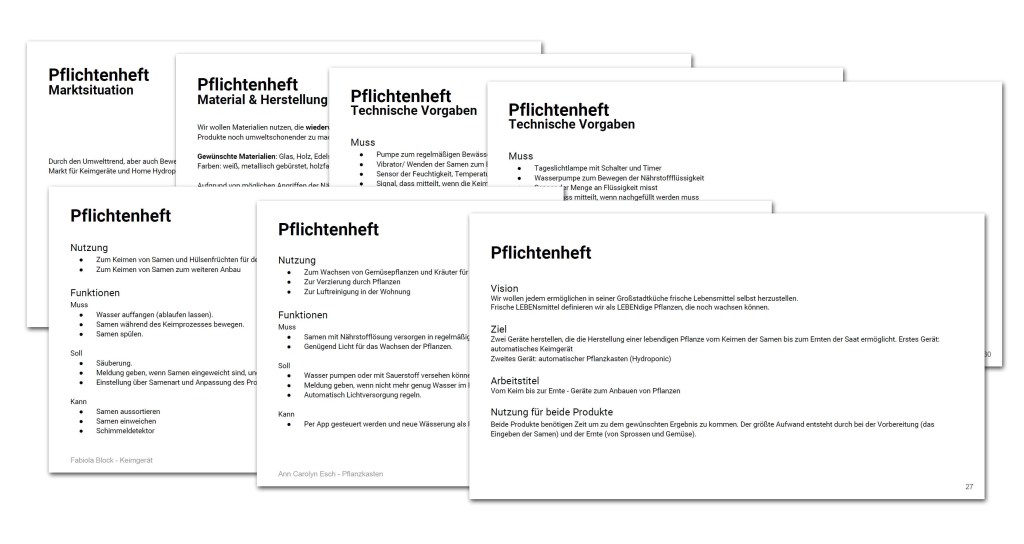
Satisfied with the research for now, our team sat together and began writing down the products requirements. Above all we defined a vision, goal and a working title. We then gathered functional and technical specifications, materials, information about product lifespan, maintenance and the market situation.
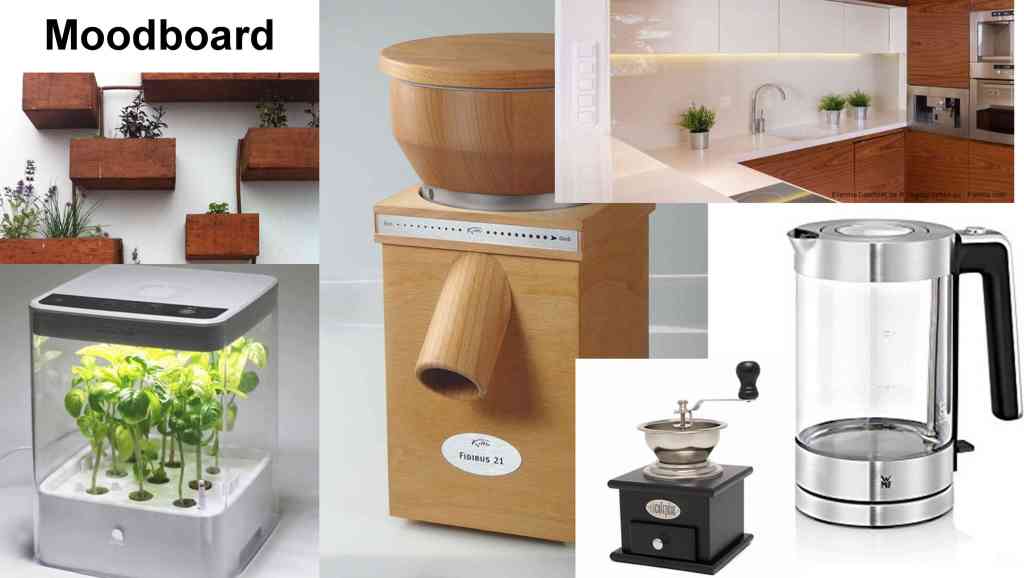
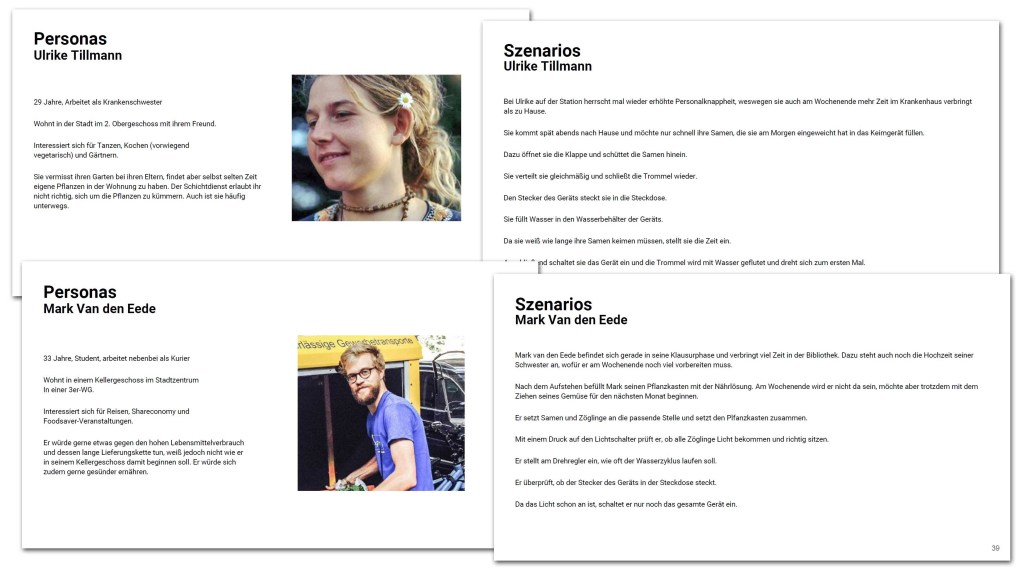
A few short scenarios for Sabrina reflected the already collected contexts. Visualising some of the above, we set the mood with a moodboard, specified our user group and gave them a face with personas and scenarios.
Ideate
With the requirements and users in focus we could start generating ideas. While scribbling down the first concept sketches, I simply tried to imagine all kind of shapes the hydroponic garden could take on. In agreement with my teammate, we then narrowed it down to more practical solutions which wouldn’t take too much space on a kitchen counter.
.
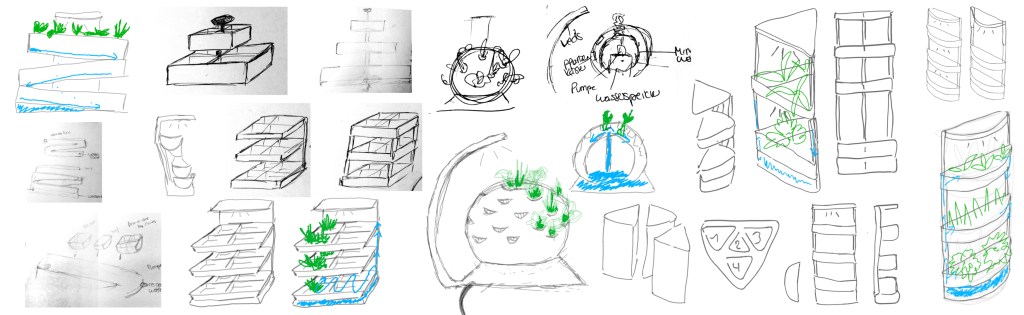
We iterated this process and sketched design variants for both products – looking for ways to create common shapes and styles between our products.
Prototype
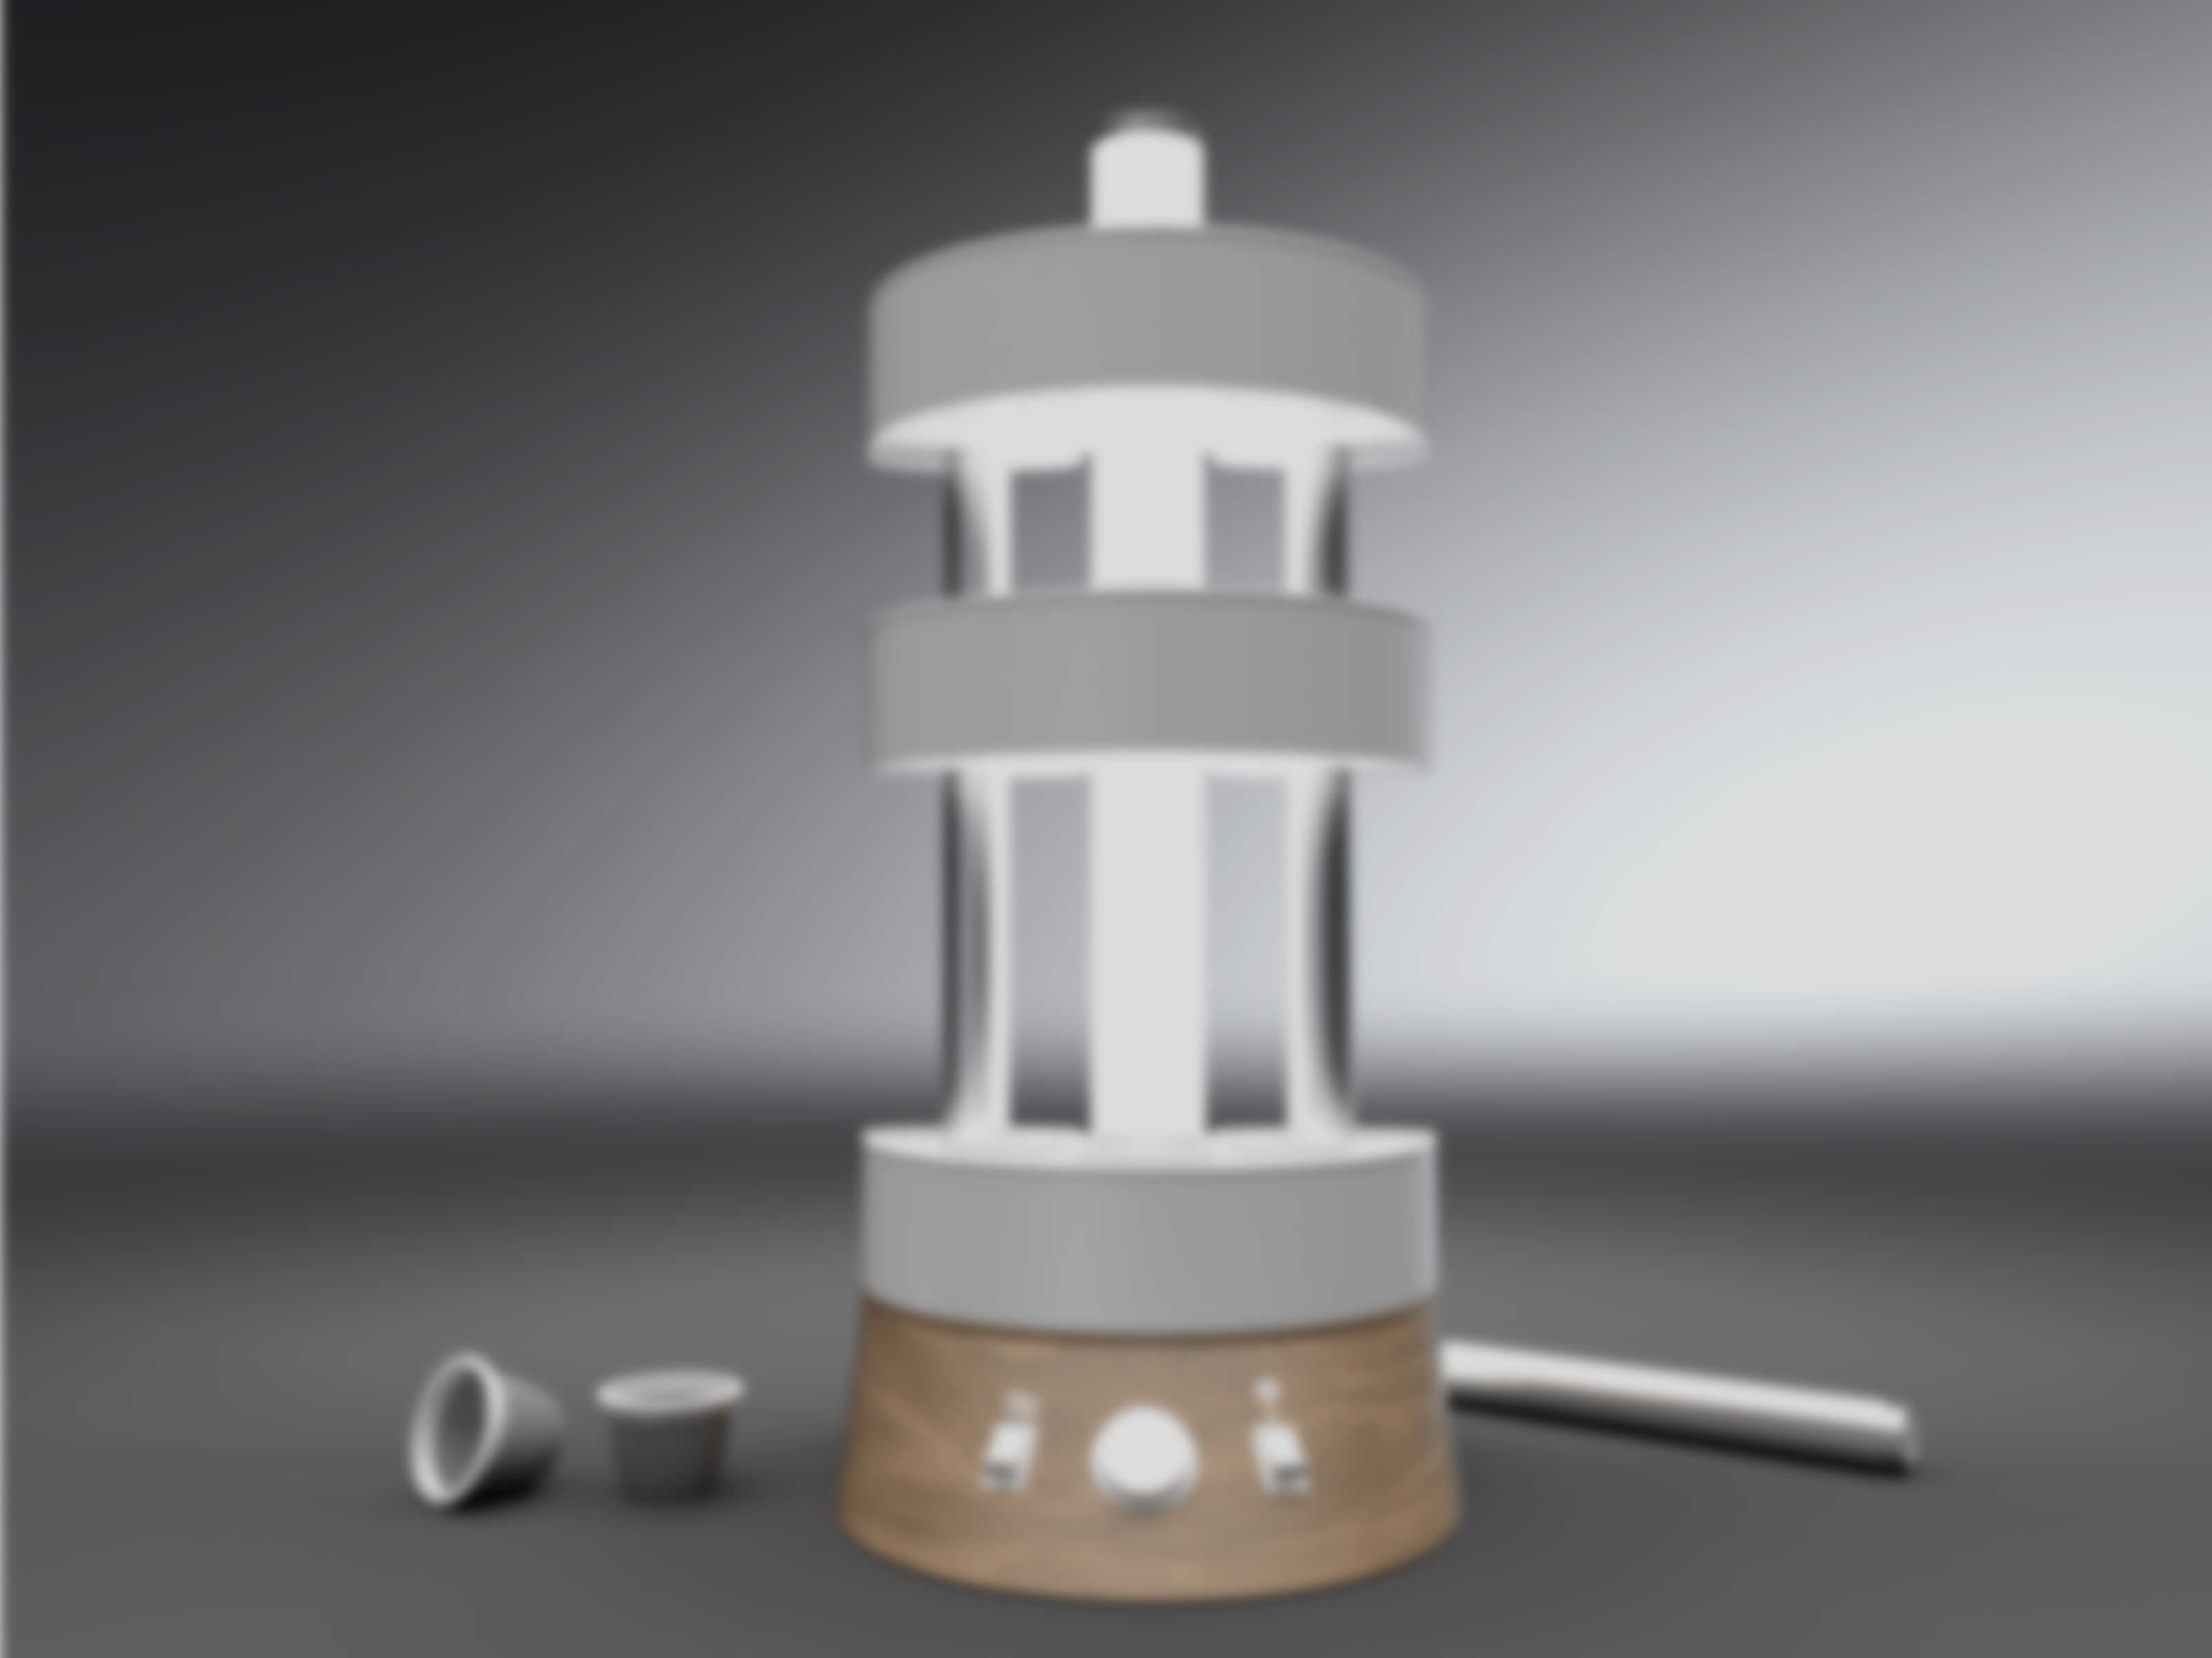
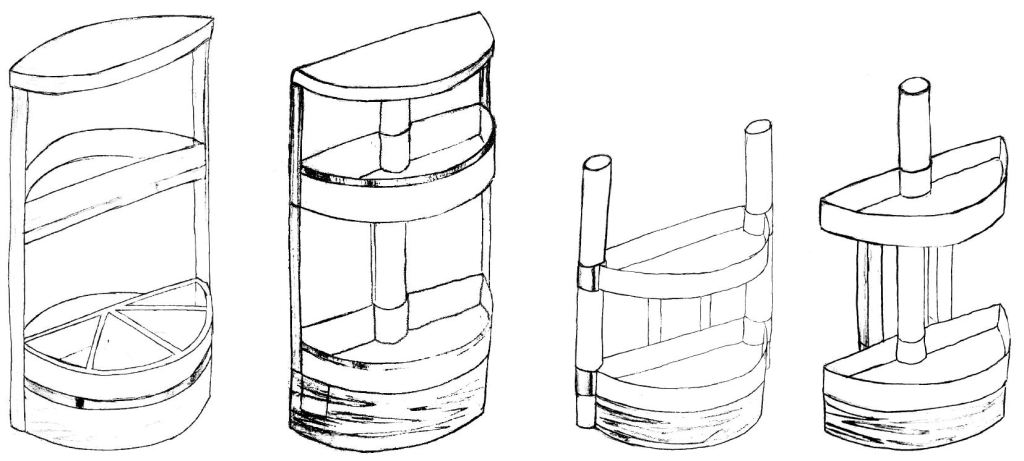
Before we both could decide which design variant we favoured, we wanted to make sure that the water flow and technical aspects of our products were reasonable. I specifically wanted the garden to be customisable in height and pump as little as possible water to minimise pumping noise. This resulted in a more technical drawing.

Then there was only one step left, before we could start modelling a prototype: styles. My teammate designed icons for the interface, while I thought about which material was suited for the components.
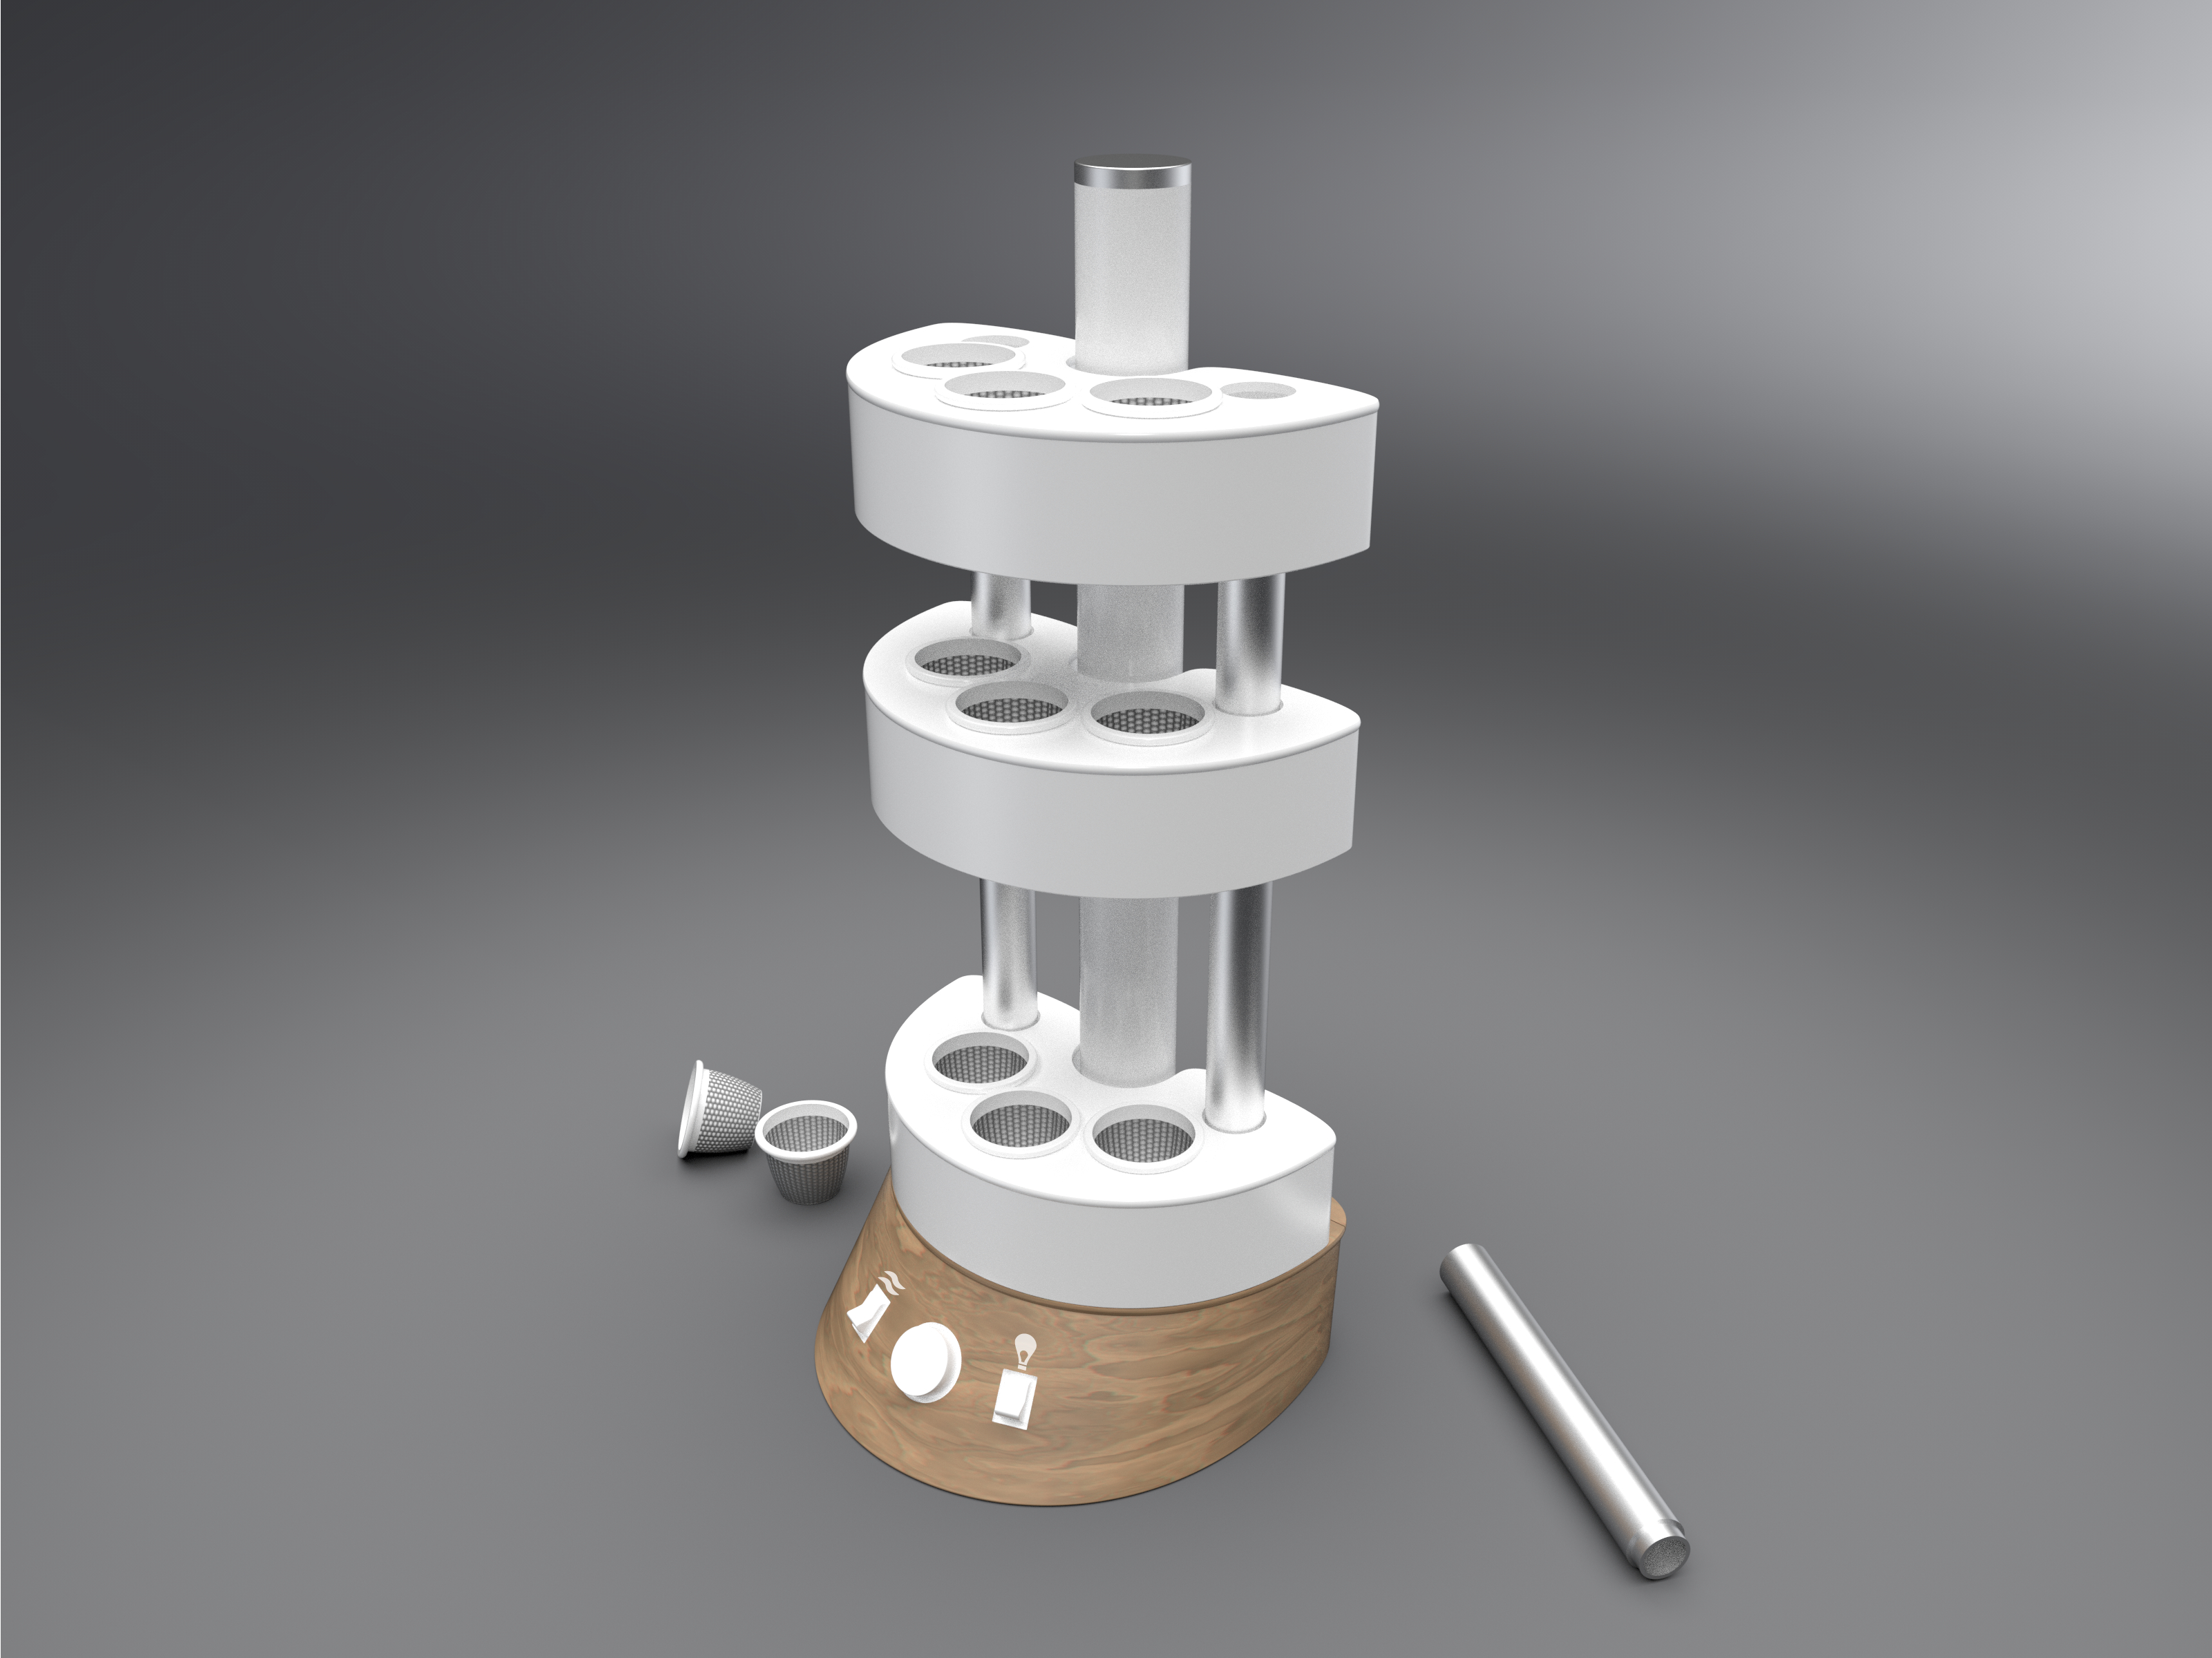
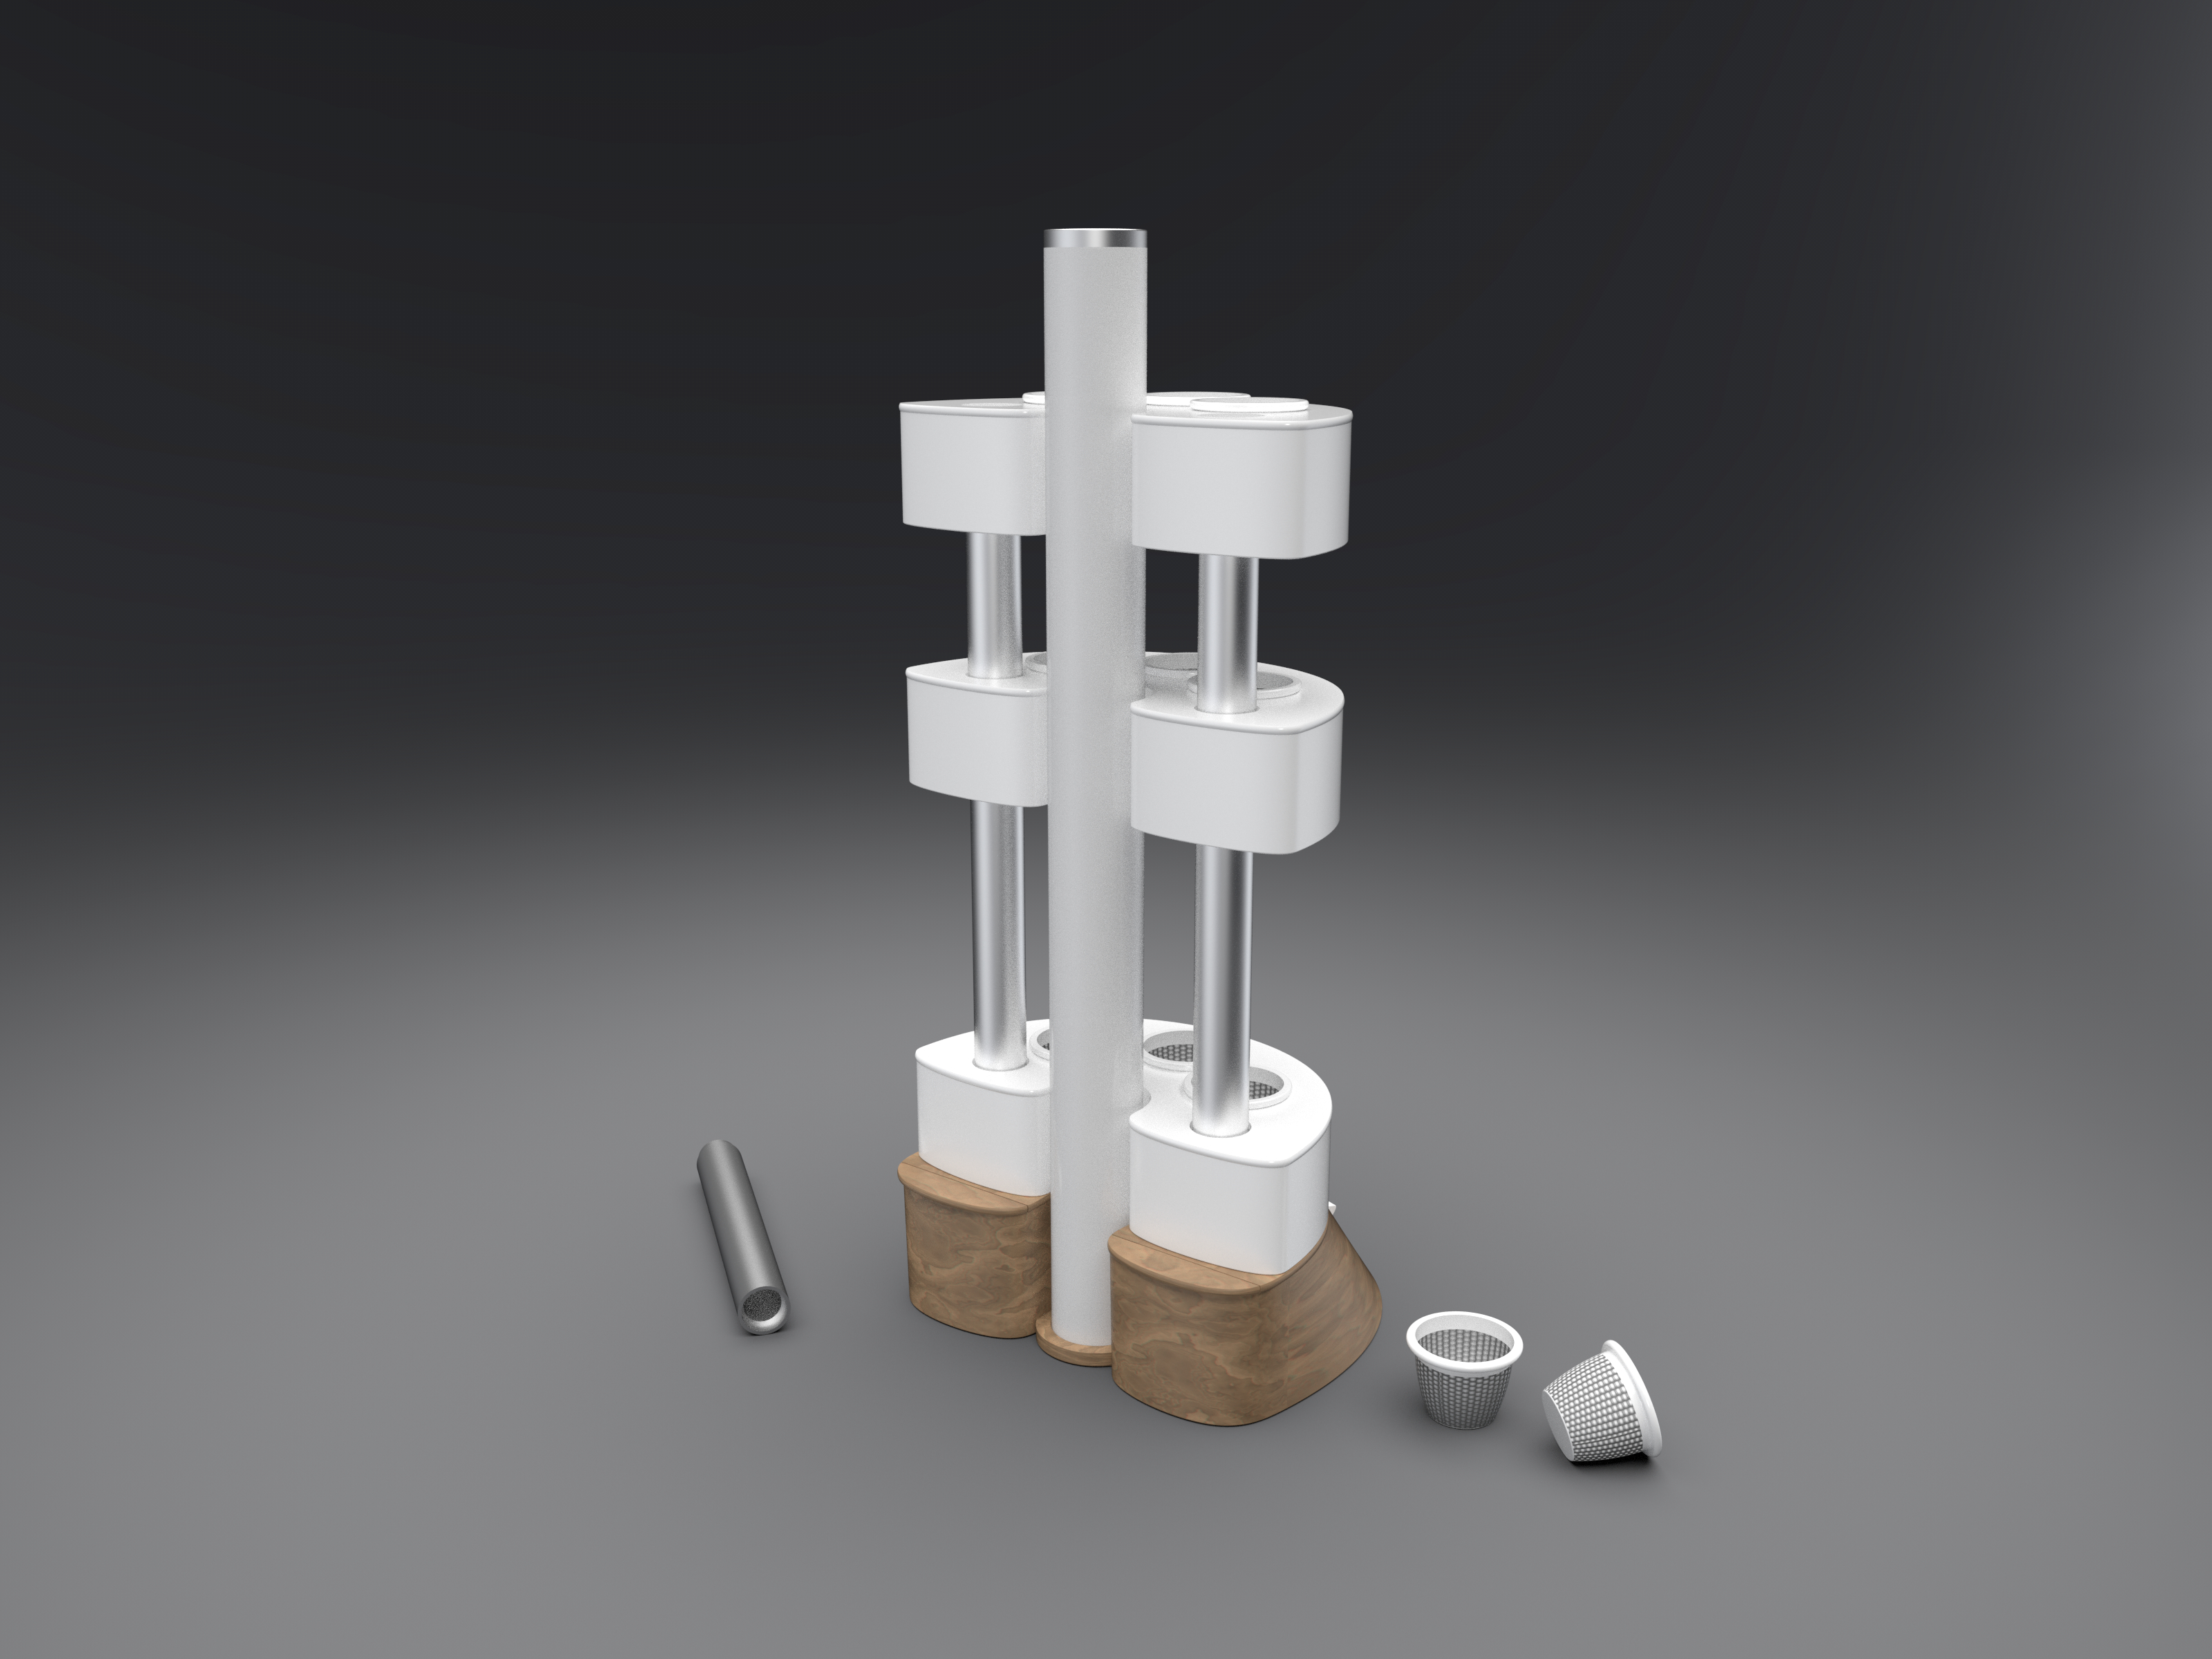
We used Autodesk Alias for modelling our products and Autodesk VRED for rendering. We chose Alias, because we both knew how to use it to create files for 3d printing and I had a little experience with VRED thanks to my internship.

Coming to a conclusion
As our final submission for the course was the renderings, we were officially finished. Considering our assignment we were able to fulfil all requirements, even if I had to improvise regarding the contextual inquiry. But it would have been nice to continue with the design thinking process, print the prototypes and test them.
Lessons I take away: Design thinking is a great system to gain deep understanding about the product, searching online for videos of similar products can be rewarding, and that you need a lot of clear communication to create a consistent design language.

